Ever stumbled across a website that just wouldn’t load correctly, even though you knew it was up and running?
Often, the culprit behind these frustrating moments is a stale DNS cache.
Today, we’ll explore how to clear DNS cache in different Browsers and Devices, ensuring you have a smoother browsing experience.
Contents
Quick Answer
Clearing your DNS cache can resolve a lot of internet connectivity issues. This quick guide will show you how to do it on Chrome, Firefox, Safari, Opera, and even on your Apple iPhone and Android devices.
What Is chrome://net-internals/#dns?
The chrome://net-internals/#dns page is a hidden feature in Google Chrome that lets you view and manage network information.
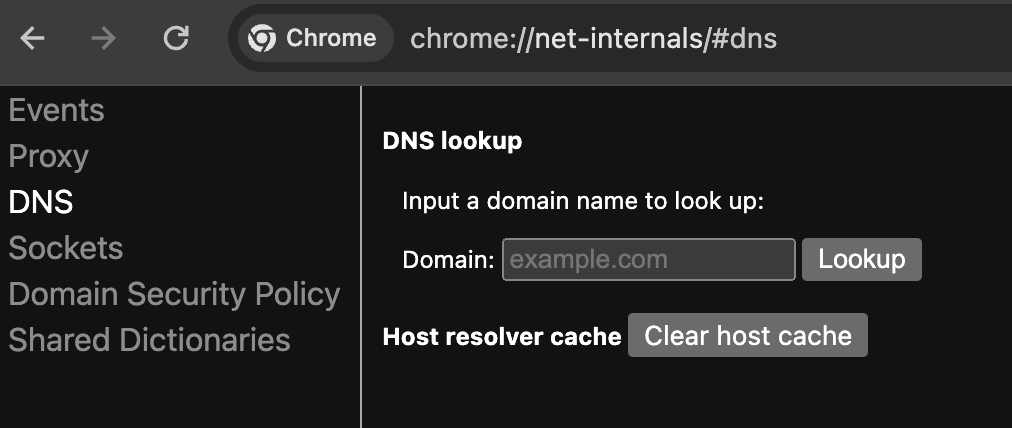
Here, you can see your DNS cache and clear it with just a couple of clicks.
Is It Necessary to Clear DNS Cache on Chrome?
Yes, clearing the DNS cache is necessary when you are experiencing issues like websites not loading or old data being served.
It helps in troubleshooting errors and ensures that you are accessing the most current version of a website.
How to Clear DNS Cache?
On Chrome
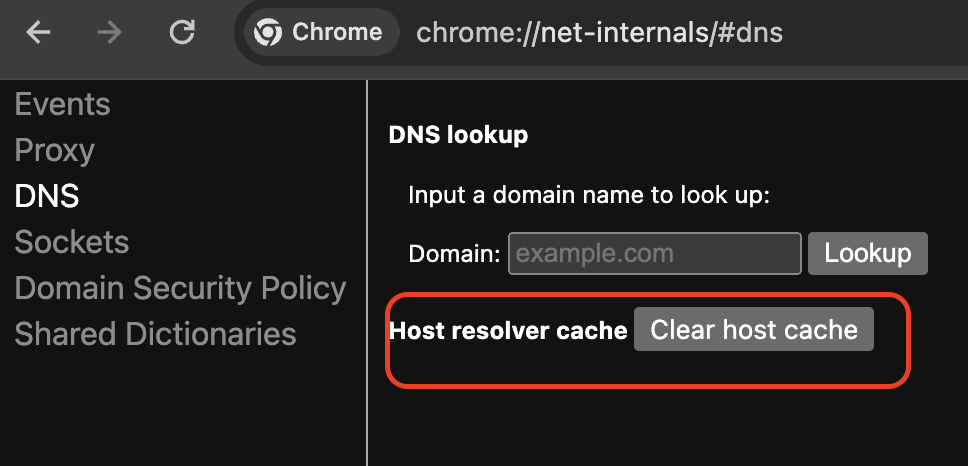
- Open Chrome and type chrome://net-internals/#dns in the address bar.
- Click on the Clear host cache button to flush the DNS cache.
You can also clear your browsing history by going to chrome://settings/clearBrowserData.
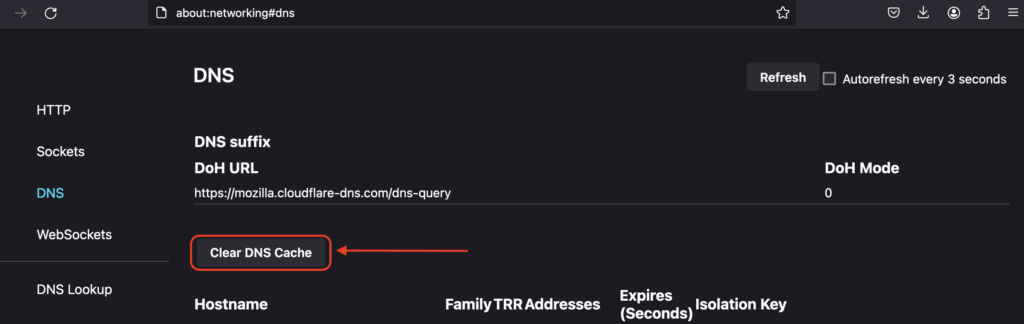
On Firefox
- Type about:networking#dns in Firefox’s address bar.
- Click on Clear DNS Cache.
For a more thorough clean, go to History > Clear Recent History > Everything.
On Safari
- Open Safari and click on the Safari menu.
- Select Preferences, then the Advanced tab.
- Check the box next to Show Develop menu in menu bar.
- From the Develop menu, select Empty Caches.
On Opera
- Open Opera and go to opera://net-internals/#dns.
- Click on Clear host cache.
- You can also clear your browsing data via Settings > Privacy & Security > Clear browsing data.
Clear DNS Cache on Your Apple iPhone
- Go to Settings > Safari.
- Scroll down and tap on Clear History and Website Data.
- Confirm your choice.
Clear DNS Cache for Your Android
- Open Chrome on your Android device.
- Tap on the three dots at the top right corner, then go to History > Clear browsing data.
- Make sure to select Cached images and files.
Bottom Line
Regularly clearing your DNS cache can help solve and prevent browsing issues. It’s a simple step towards maintaining your device’s health and ensuring a frictionless internet experience.
Frequently Asked Questions
Q. What happens when I clear my DNS cache?
Clearing the DNS cache removes all the saved addresses of previously visited websites, which your browser might try to load again for speed.
Clearing it means your browser will retrieve the latest information from the web.
Q. How often should I clear my DNS cache?
It’s not necessary to clear your DNS cache regularly unless you are experiencing specific issues like websites not loading properly or appearing outdated.
Q. Can clearing my DNS cache affect my browsing history?
No, clearing the DNS cache does not affect your browsing history. It only removes the temporary files associated with domain name lookups.