OneDrive is among the highly preferred cloud storage services available today. The top reasons include its integration with the Microsoft Office Applications and best compatibility with Windows. It routinely synchronizes with multiple files of users and it does it without disturbing the users in their tasks.
Nonetheless, it does possess some hitches. In case the OneDrive is synchronizing the files, it can relatively slow down the computer or also reduce the battery life. Moreover, not everyone wants all of their files to be stored in cloud by default.
This article will help you to disable OneDrive in Windows 10 permanently or temporarily if you experience issues like these on Windows 10.
Contents
- 1 Steps to Unlink, Remove, or Disable OneDrive in Windows 10
- 2 Quick Answer
- 3 5 Solutions to Disable OneDrive in Windows 10
- 4 The Bottom Line
- 5 Frequently Asked Questions
Steps to Unlink, Remove, or Disable OneDrive in Windows 10
Windows 10 already has OneDrive application preinstalled and ready-to-use. Yet, users can try to disable the application for many reasons like
- cleaning the Windows file explorer,
- prevention of constant file synchronizations,
- protecting the data from different forms of cybercrime, and more.
Quick Answer
One temporary solution can be to either use the ‘pause’ option available in the settings tab or to remove files from OneDrive folder. For the long-term solution, users can unlink or uninstall OneDrive from the system itself.
The article comprises 5 solutions to help disable, remove, or unlink OneDrive in your Windows 10. But these solutions are not only limited to Windows 10, Windows 7, 8, and 8.1 computers can also use them.
Choose the appropriate method and follow the steps carefully to remove OneDrive from the system.
Note: Since some solutions might cause OneDrive lose file, just ensure that the important files have back up to the external drive, prominently.
5 Solutions to Disable OneDrive in Windows 10
#1. Disable OneDrive: Unlinking the Account
- In Windows 10, click the OneDrive cloud icon, which could be either white or blue in color.
- After clicking ‘Help & Settings’, Choose ‘Settings’
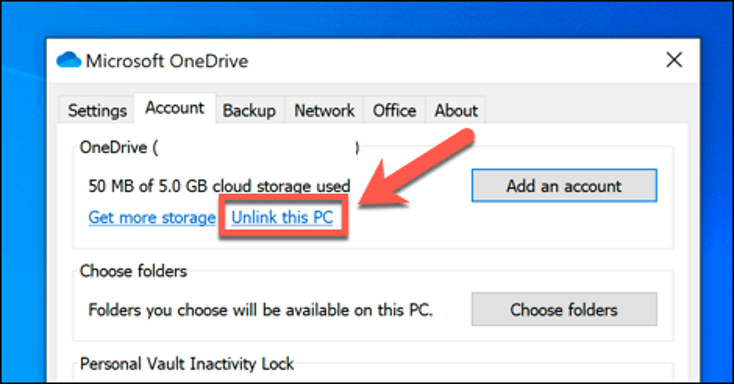
- After clicking ‘Unlink this PC’ on the Account tab, select ‘Unlink account’
- Next, select ‘OK’ to verify.
#2. Uninstall or Hide OneDrive – Permanently Remove/Disable OneDrive
Alternate 1: Hide OneDrive
Since OneDrive cannot be uninstalled directly, it is integrated into certain Windows versions. To hide it from the computer, follow the instructions given below:
- In Windows 10, click on the OneDrive icon located in the taskbar.
- After clicking ‘Help & Settings’, Choose ‘Settings’.
- Uncheck every box under General.
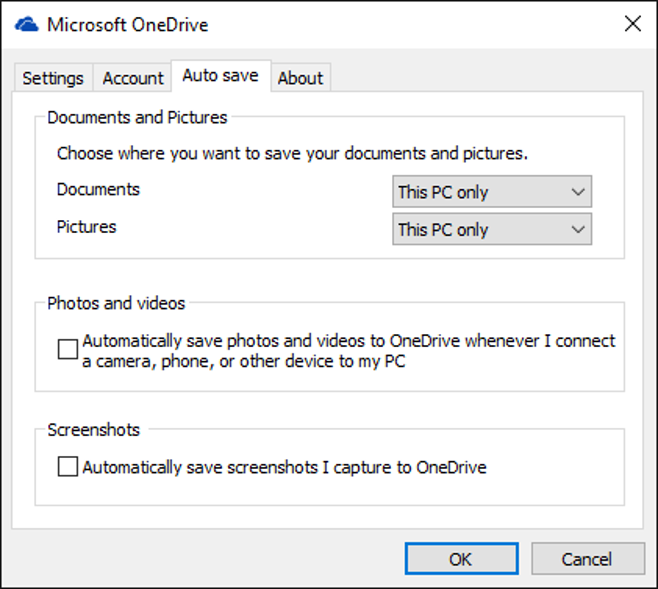
- Select ‘This PC only’ from the ‘Documents & Pictures’ list on the Auto Save tab, then uncheck the remaining options.
- Select the “Choose folders” option under the Account tab. Now check or uncheck the option to ‘Synchronize all folders and files in my OneDrive’.
- Tap ‘OK’ to apply the changes.
- Navigate to the Account tab in Settings, select ‘Unlink OneDrive,’ and then shut the ‘Welcome to OneDrive’ window.
- Launch File Explorer. Now right-click on OneDrive and select “Properties” from the menu.
- Click on the General tab and select the ‘Hidden’ option.
- Click Help & Settings and choose ‘Quit OneDrive’.
Alternate 2: Uninstall OneDrive
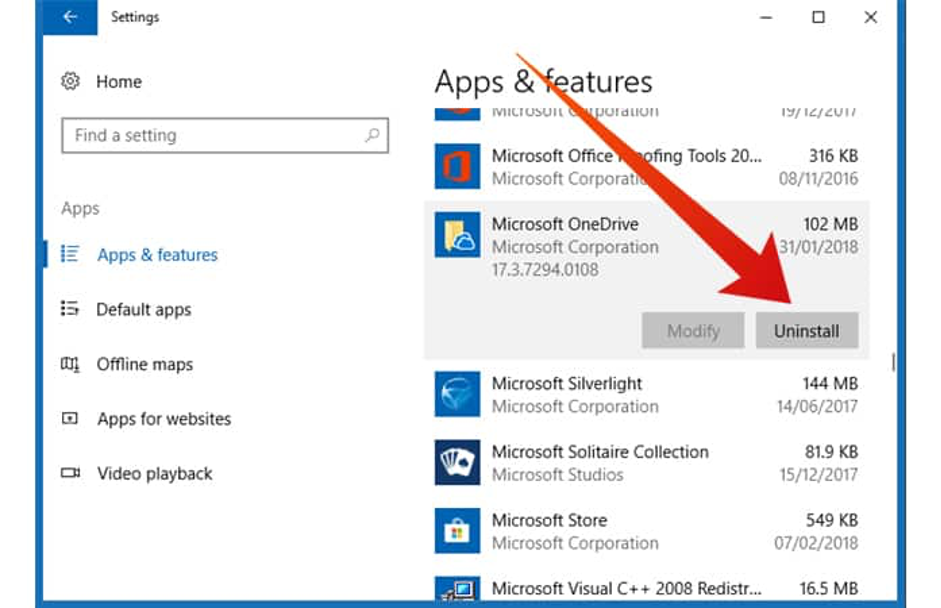
- Choose the Start button on Windows and enter ‘Programs’ in the search tab. Now choose “Add or Remove the Programs“.
- In the Apps & Features option, choose ‘Microsoft OneDrive’ and choose ‘Uninstall’.
#3. Stop Folder/File Syncing in OneDrive Sync Application
If users do not prefer their OneDrive synchronizing all the files to their computer, they can stop the process of syncing folders and files. As per the experience by some users, files usually get deleted or lost when users try to delete the files in their OneDrive and have enabled the syncing option.
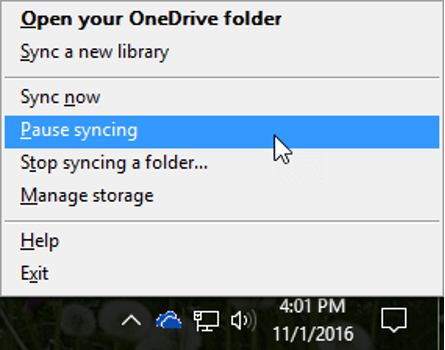
- Click on the OneDrive symbol on the taskbar. Then, choose ‘Help & Settings’ or ‘…More’; next, click ‘Pause Syncing’ and choose ‘2 hours’.
- Choose “Help & Settings” by clicking the OneDrive icon, then click “Settings“.
- Select “Choose folders” from the Account menu.
- Uncheck the folders which do not need be synchronized to the computer in ‘Sync your OneDrive files to this Computer’ window, then click “OK“.
After that, users can make changes to files on their PC or in OneDrive without impacting the information on the many other platforms.
#4. Disable OneDrive through Group Policy
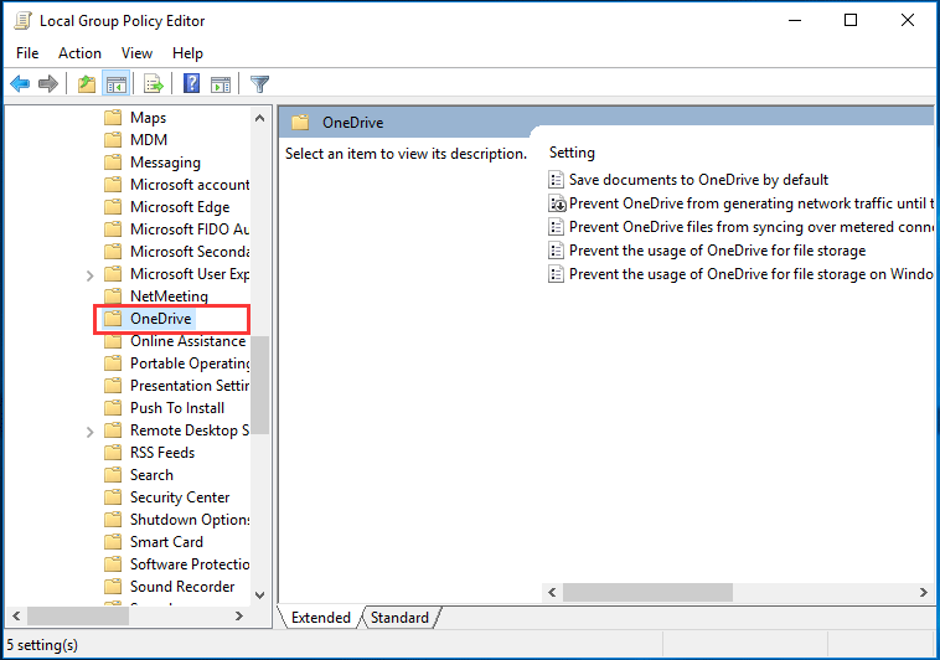
- Use the Windows + R keys to launch the run dialog. Type gpedit.msc and select “OK“.
- When the Local Group Policy window appears, navigate to: \Computer Configuration\Administrative Templates\Windows Components\OneDrive.
- Double-click on the ‘Stop storing files on OneDrive’ option.
- Select “Enabled” and then click ‘Apply’ and ‘OK’ to save the changes.
After this, when users restart their computer, OneDrive will appear but will not be accessible.
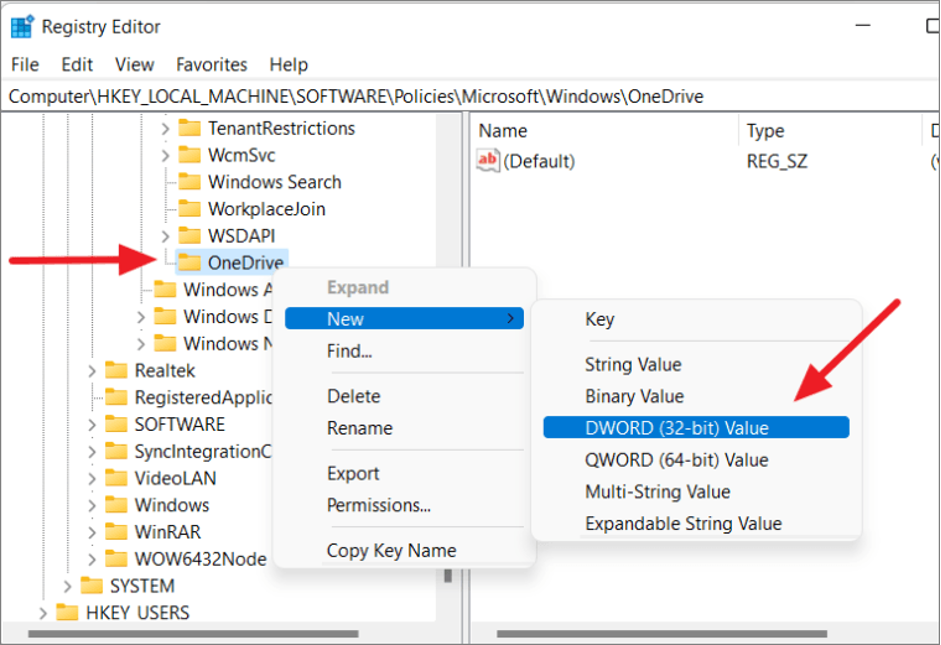
#5. Disable OneDrive with the help of Registry Editor
Note: Generally speaking, it is actually not advised to use Registry Editor to deactivate OneDrive. Even if it is feasible, an incorrect operation could have detrimental effects later.
Thus, follow the instructions below and proceed cautiously when disabling OneDrive:
- Press Windows + R, type regedit, then select ‘OK’.
- When the Registry Editor starts, navigate to HKEY_LOCAL_MACHINE\SOFTWARE\Policies\Microsoft\Windows.
- Choose ‘New’ > ‘Key” with a right-click on the Windows key.
- The new key’s name will be ‘OneDrive’.
- Choose the OneDrive folder, now do a right click on the blank space in the right panel, and choose ‘New’ > ‘DWORD(32 bit) Value’ from the menu by.
- Name this new key ‘DisableFileSyncNGSC’ and double-click on it, set its value data to 1, and select ‘OK’.
- After this, restart the system.
The Bottom Line
It is not really difficult to disable OneDrive, irrespective is the users need to fix it quickly or need a permanent fix. If by any chance OneDrive fails to work smoothly due to any possible error and turning it off is the only solution, the above methods will prove right. But besides, if the error still persists, users can choose to remove OneDrive.
Frequently Asked Questions
Q. Should users Disable OneDrive?
If users have a poor connection of the internet or they have a unique cloud storage provider, they might prefer to disable OneDrive.
There’s no convincing reason to not disable the file synchronization temporarily, given how simple it is to perform.
However, users can make to recall the steps to undo it.
Q. Can OneDrive be Disabled from the Startup?
Yes it can be! Just open Task Manager in Windows and choose ‘startup’ option.
A list of programs will be seen here, which will first run when the computer is turned on.
If this list includes OneDrive, users can perform left-click on it and select ‘disable’ from below (right side), or simply perform right-click on it and choose ‘disable’ from the appearing drop down list of options.